Setting Up and Programming Arduino Uno
In the realm of microcontrollers, Arduino Uno stands as a friendly gateway for newcomers, allowing them to explore the captivating world of electronics. This article aims to demystify the basics of Arduino Uno, complete with clear diagrams and explanations, making it accessible to beginners.

Arduino Uno: A Brief Overview
Arduino Uno is an open-source microcontroller board powered by the ATmega328P chip. Its purpose is to simplify electronics for everyone, from novices to seasoned engineers. Before we dive into the nitty-gritty, let’s grasp some key features:
Key Features:
- ATmega328P Microcontroller: Think of it as the brain of your Arduino Uno, capable of executing your programmed instructions.
- Digital and Analog Pins: Arduino Uno boasts 14 digital pins and 6 analog pins. These are your connection points for various components and sensors.
- USB Interface: This serves a dual purpose – uploading code from your computer and establishing serial communication with other devices.
- Power Supply: Arduino Uno can draw power either via USB or an external power source.
- Built-in LED: Pin 13 features a built-in LED for easy testing and debugging.

Setting Up Your Arduino Uno
1. Software Installation:
Before we get hands-on, ensure you have the Arduino IDE (Integrated Development Environment) installed on your computer. You can download it from the official Arduino website here. Follow the installation instructions pertinent to your operating system.
2. Physical Connection:
Now, let’s lay the groundwork with the hardware setup.
What You’ll Need:
- Arduino Uno board
- USB A to B cable (usually included with the board)
- Computer
Connection Steps:
- Connect Your Arduino to Your Computer:
- Plug one end of the USB cable into your Arduino Uno.
- The other end goes into a USB port on your computer.

- Powering Your Arduino:
- For this step, you need not do anything special; your Arduino Uno will draw power from your computer through the USB connection.
3. Testing Your Setup:
To ensure everything is functioning as it should, we’ll upload a simple “Blink” sketch to your Arduino Uno.
- Launch the Arduino IDE on your computer.
- Navigate to “File” > “Examples” > “01.Basics” > “Blink.”

- Inside the Blink sketch, you’ll spot a line of code:
digitalWrite(13, HIGH);. This line controls the onboard LED at pin 13. No additional connections are needed for this step. - Press the “Upload” button (the right arrow) in the Arduino IDE to compile and send the sketch to your Arduino Uno.

- In successful execution, the LED on your Arduino Uno will commence blinking.
You’ve just set up your Arduino Uno and loaded your first program. Bravo!
Crafting Your First Arduino Code
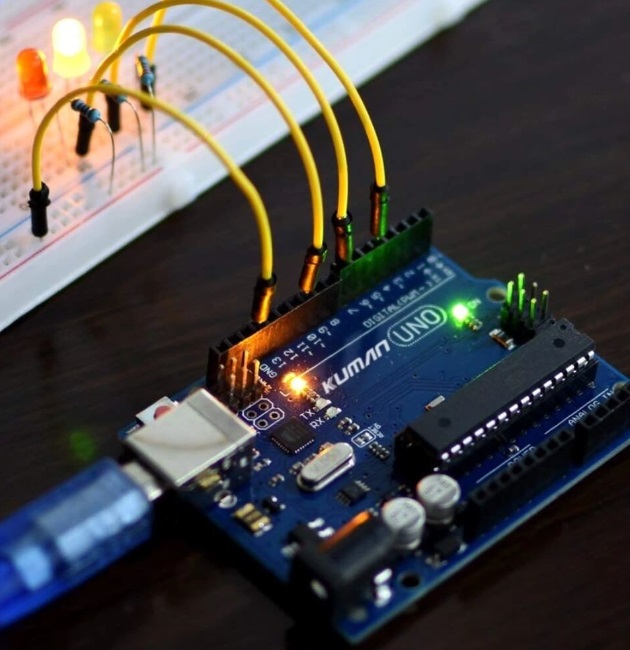
Now that you have your Arduino Uno up and running, let’s embark on writing a simple program to control an external LED.
What You’ll Need:
- 1 x LED
- 1 x 220-330-ohm resistor
- 2 x Male-to-female jumper wires
- Breadboard (optional)
Connection Steps:
- Connect the longer leg (anode) of the LED to one leg of the resistor.
- Link the other leg of the resistor to a digital pin (e.g., pin 8) on your Arduino Uno.
- Attach the shorter leg (cathode) of the LED to the ground (GND) pin on the Arduino Uno.
- Power your Arduino Uno via USB.

Writing the Code:
Now, let’s craft a simple program to make the external LED blink in harmony.
const int ledPin = 8; // Pin connected to the LED

void setup() {
  pinMode(ledPin, OUTPUT); // Set the LED pin as an output
}

void loop() {
  digitalWrite(ledPin, HIGH); // Turn the LED on
  delay(1000); // Wait for 1 second
  digitalWrite(ledPin, LOW); // Turn the LED off
  delay(1000); // Wait for 1 second
}
Uploading the Code:
- Open the Arduino IDE and paste the code above into a new sketch.
- Ensure your Arduino Uno is still connected to your computer via USB.
- Click the “Upload” button (the right arrow) in the Arduino IDE.
- Witness the LED attached to pin 8 as it starts blinking at a rhythmic 1-second interval.
You’ve now achieved the remarkable feat of programming your Arduino Uno to manipulate an external LED!
Conclusion
Arduino Uno emerges as an exceptional tool for both beginners and seasoned engineers, granting access to the captivating universe of electronics and microcontrollers. The user-friendly IDE, combined with an extensive community, unveils boundless possibilities. Commence your journey with elementary projects, such as LED control, and gradually delve into more intricate endeavors. Experiment, learn, and revel in your Arduino adventure!

